Welcome to our comprehensive guide on how to make cold foam at home, a veritable bible on mastering the art of creating creamy delights. Cold foam is a light, fluffy topping that adds a unique touch to your favorite beverages, turning ordinary drinks into gourmet experiences. This guide takes you on a delightful journey where you will learn not just a cold foam recipe, but the science, the history, and the nuances behind this culinary marvel. Whether you’re a seasoned barista or a DIY enthusiast eager to elevate your home-brewed drinks, this guide will help you craft the perfect cold foam to add a touch of finesse to your beverages. Let’s embark on this frothy adventure together.
What is Cold Foam? – Key Takeaway
- Understand the Basics: The fundamentals of this fluffy topping involve choosing the right milk, using the correct equipment, and understanding the frothing process. Low-fat or non-fat milk works best for creating a light, airy foam.
- Expand Your Flavor Horizons: This foam isn’t just limited to plain milk foam. You can add various flavors and sweeteners to enhance your experience, from vanilla and pumpkin to more decadent options like peppermint chocolate cream.
- Master the Technique: Making this froth requires specific techniques, whether you’re using a milk frother, a handheld mixer, or a French press. Learn these techniques to create the perfect, creamy, and frothy foam every time.
- Avoid Common Pitfalls: To get your foam just right, avoid common mistakes like choosing the wrong milk, overfilling your frother, and adding flavorings or sweeteners too late in the process.
- Experiment with Beverages: Once you’ve created your froth, the fun begins. Incorporate it into a range of beverages, from coffee and tea to smoothies and cocktails. The creamy, frothy addition of the foam can take your drinks to a new level of deliciousness.
Introduction to Cold Foam
This topping is a delightful addition to a range of beverages, creating a unique contrast of cold, creamy texture against the warmth of your drink. Perfectly whipped, it forms a velvety, frothy topping that enhances the flavor and aesthetic appeal of your drinks. The sheer versatility of this foam allows it to complement a wide range of beverages, from coffees to teas and beyond.
The Science Behind Cold Foam
The key to understanding how to craft the perfect cold froth lies in the science of milk itself. Milk is essentially composed of water, fat, and proteins. (1) When you whip milk, it introduces air bubbles into the liquid. The proteins in the milk, particularly casein, and whey, unfold and rearrange themselves around these air bubbles, creating a network that holds the bubbles in place. This results in the formation of foam.
However, this froth is a little different from its hot counterpart. This topping requires low-fat milk because the lower the fat content, the easier it is for the proteins to create a strong network around the air bubbles, thus creating a stiffer and more stable foam.
Cold Foam: A Historical Perspective
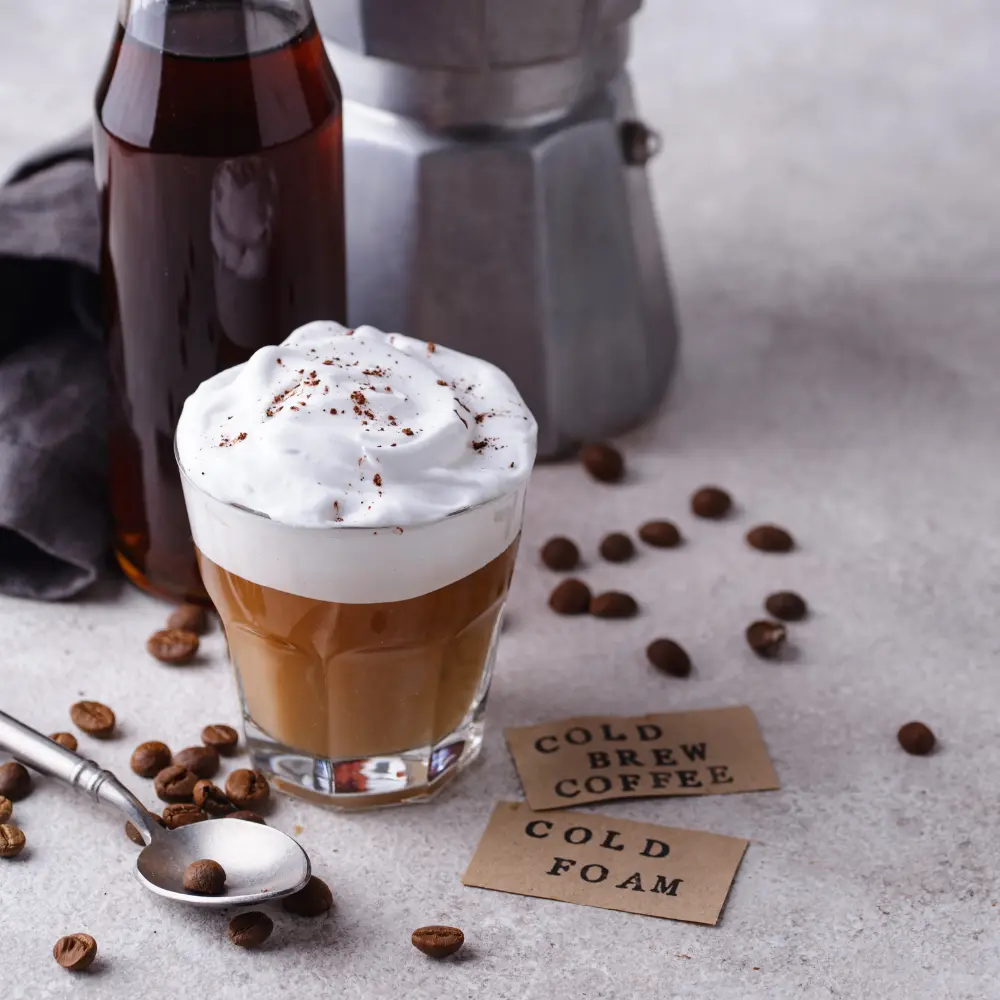
The invention of this foam is largely attributed to the world-renowned coffeehouse chain, Starbucks, who introduced it to their menu in 2014 as part of their ‘Cold Foam Cascara Cold Brew’. Since then, it has become an integral part of the global coffee culture. The popularity of this topping has grown tremendously over the years, as coffee lovers around the world enjoy the contrast between the cold, frothy foam and their hot beverages.

Essential Ingredients for Making Cold Foam
Creating the perfect froth requires a careful selection of ingredients that contribute to its texture, sweetness, and flavor profile. While the basics remain the same, the choice of milk and sweeteners can dramatically influence the outcome. Let’s delve into the details to enhance your expertise.
Choosing the Right Milk for Cold Foam
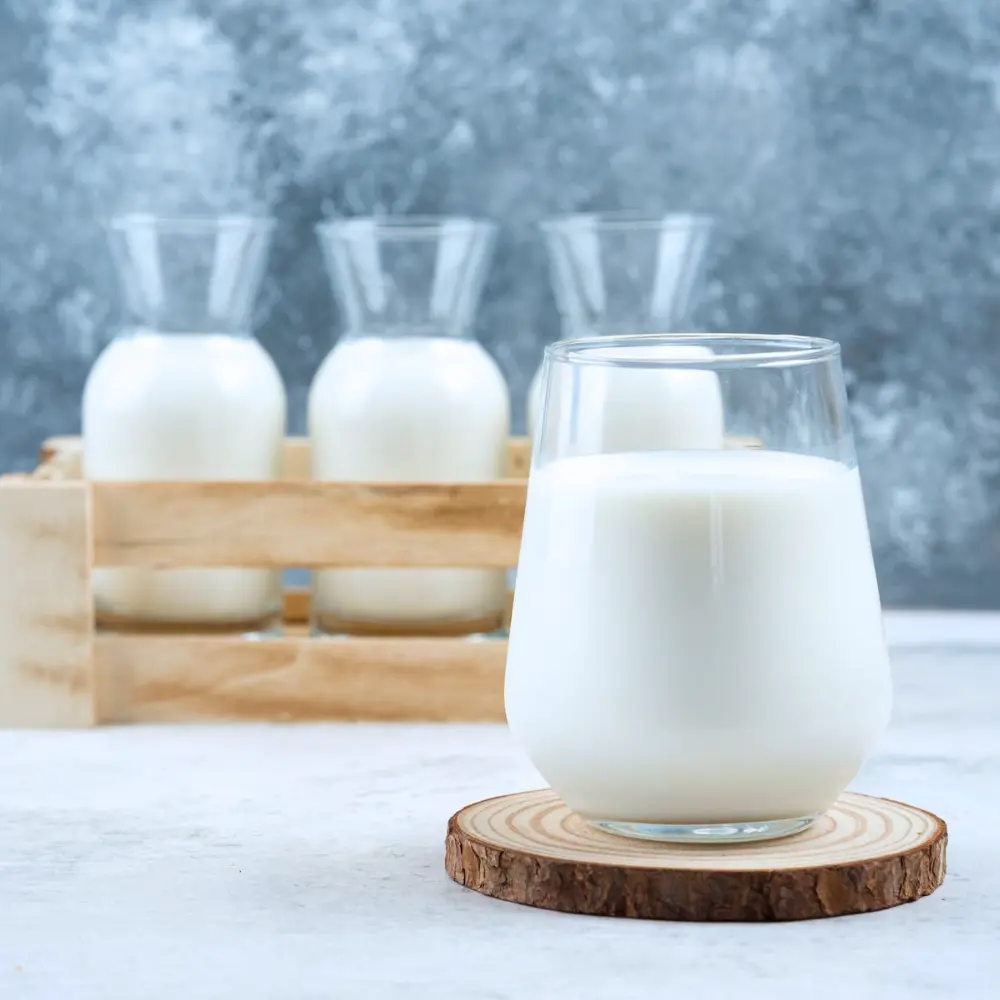
The selection of milk is a critical factor in crafting this foam. Not all kinds of milk foam equally, and the type of milk can significantly impact the foam’s consistency and flavor. Here’s a quick guide:
- Non-fat or low-fat milk: Non-fat or low-fat milk produces the most froth because it has a high protein-to-fat ratio. The proteins create a strong network around the air bubbles, resulting in a stiffer and more stable foam.
- Whole milk: Whole milk produces a creamier foam with a richer taste due to its higher fat content. However, it won’t create as much volume as non-fat or low-fat milk.
- Plant-based milk: Soy milk creates foam similar to non-fat dairy milk due to its high protein content. Almond and oat milk can also be used, but they yield less froth.
- Lactose-free milk: Lactose-free milk can froth just as well as regular milk, but it might provide a slightly sweeter taste due to the presence of lactase.
The Role of Sweeteners

Sweeteners not only add sweetness but also impact the foam’s texture and volume. Here’s how:
- Sugar: Regular granulated sugar can be used, but it might not dissolve completely in cold milk. Therefore, it’s advisable to use sugar syrup or dissolve sugar in a little warm milk before adding it to the foam.
- Sugar substitutes: If you’re watching your sugar intake, sugar substitutes like stevia or erythritol can be used. However, they may not contribute the same volume and texture as real sugar.
- Honey and Maple Syrup: These natural sweeteners can be used for a healthier version, adding distinct flavors to your froth.
Flavor Variations: Expanding Your Horizons

Once you master the basic cold foam recipe, the world of flavor variations awaits. From the simple addition of vanilla extract to complex concoctions involving caramel or cocoa, the possibilities are limitless. Here are a few suggestions:
- Vanilla Foam: Add a splash of pure vanilla extract and a little sugar to your milk before frothing.
- Vanilla Sweet Cream Cold Foam adds a sweet, velvety layer to your drinks. It’s made by whipping together vanilla syrup, milk, and heavy cream, resulting in a luscious, creamy foam.
- Cinnamon Foam: A sprinkle of cinnamon in your foam can add a wonderful aroma and a warm, spicy taste.
- Mocha Foam: Add a dash of cocoa powder for a chocolatey twist. Remember to blend it well to avoid clumps.
- Mint Foam: A drop or two of the mint extract can create a refreshing minty foam, perfect for iced coffees or teas.
- Pumpkin Cold Foam is a popular choice during the fall season. This variation incorporates the flavors of pumpkin spice into the foam, creating a festive twist.
Remember, when adding flavors, the key is to balance the flavors and sweetness to suit your palate.

Equipment Needed for Perfect Cold Foam
The secret behind the perfect cold froth is not just the recipe, but also the right equipment. While achieving the ideal frothy consistency might seem daunting, it is much simpler with the right tools in your culinary arsenal. Let’s walk through the equipment that will make your froth crafting journey a breeze.
Understanding the Different Types of Frothers

A milk frother is the key player in the game of creating this topping. These come in various types, each with its own merits:
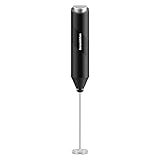
- Handheld Electric Frothers: These are affordable, compact, and easy to use. With a push of a button, the whisk at the end of the frother whips air into the milk, creating froth. While these are excellent for occasional use, they might not be as durable as other options.
- Manual Frothers: These resemble a French press and work on the same principle. They have a plunger with a mesh screen that moves up and down to froth the milk. Manual frothers give you more control over the frothing process but require a bit of elbow grease.
- Electric Froth Makers: These are the most convenient and can heat and froth milk at the touch of a button. However, they are also the most expensive. Some models even have a cold froth setting, making them perfect for this froth.
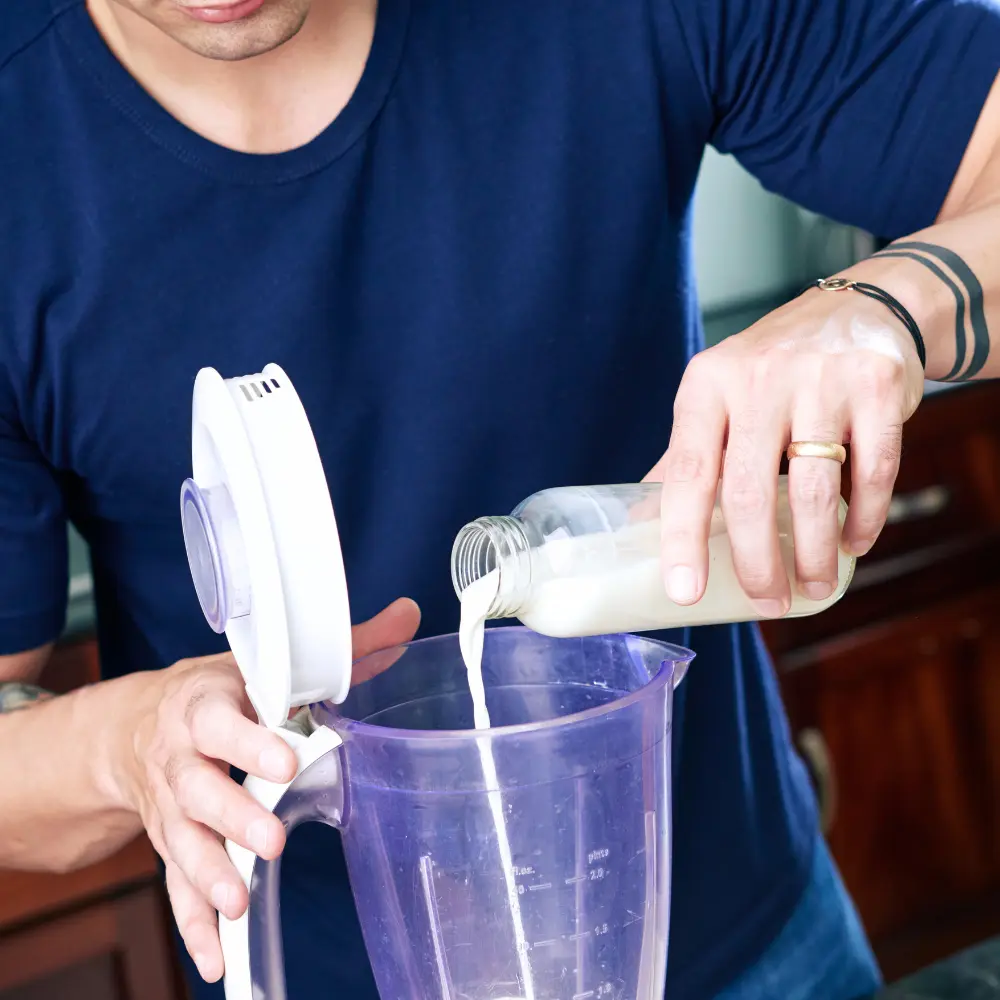
The Role of a Blender in Creating Cold Foam
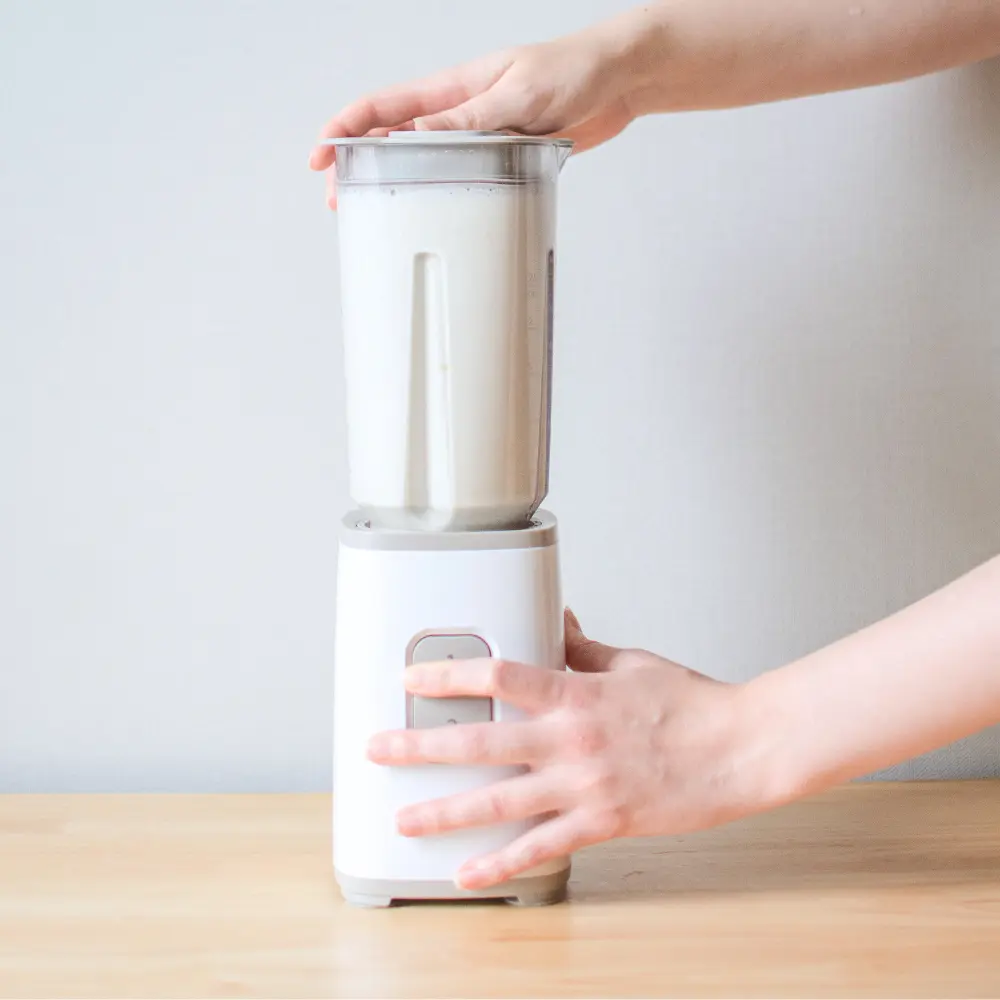
If you don’t have a milk frother, don’t worry! A blender can also do the job. Add your milk and any sweeteners or flavors to your blender, then blend until the milk becomes frothy and has doubled in volume. The result is a creamy, rich cold froth. However, it’s crucial to note that blenders can sometimes incorporate too much air, resulting in larger bubbles and a less creamy foam than a frother would produce.
Creating Cold Foam with a Milk Frother
The most common tool to make this topping is a milk frother. It’s designed to incorporate air into the milk, transforming it into a frothy delight:
- Fill your frother with the desired amount of cold, low-fat, or non-fat milk, but no more than halfway to give the milk space to froth and expand.
- Add any flavors or sweeteners if desired, and froth until the milk doubles in volume.
- Carefully pour the frothy, creamy cold froth over your beverage of choice.


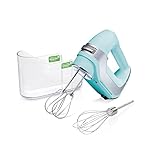
Creating Cold Foam with a Handheld Mixer

If you don’t have a milk frother, a handheld mixer can also do the job. The process is simple:
- Pour your milk into a large bowl, and add any desired flavors or sweeteners.
- Use the whisk attachment on your mixer, and beat the milk on medium-high speed until it forms a frothy consistency.
- Gently layer your foam on your beverage and enjoy.


How to Make Cold Foam Without a Frother
No milk frother? No problem! There are several alternative methods to make this topping without a frother. These are particularly useful if you’re just beginning your journey with this foam and want to try it out before investing in specialized equipment.
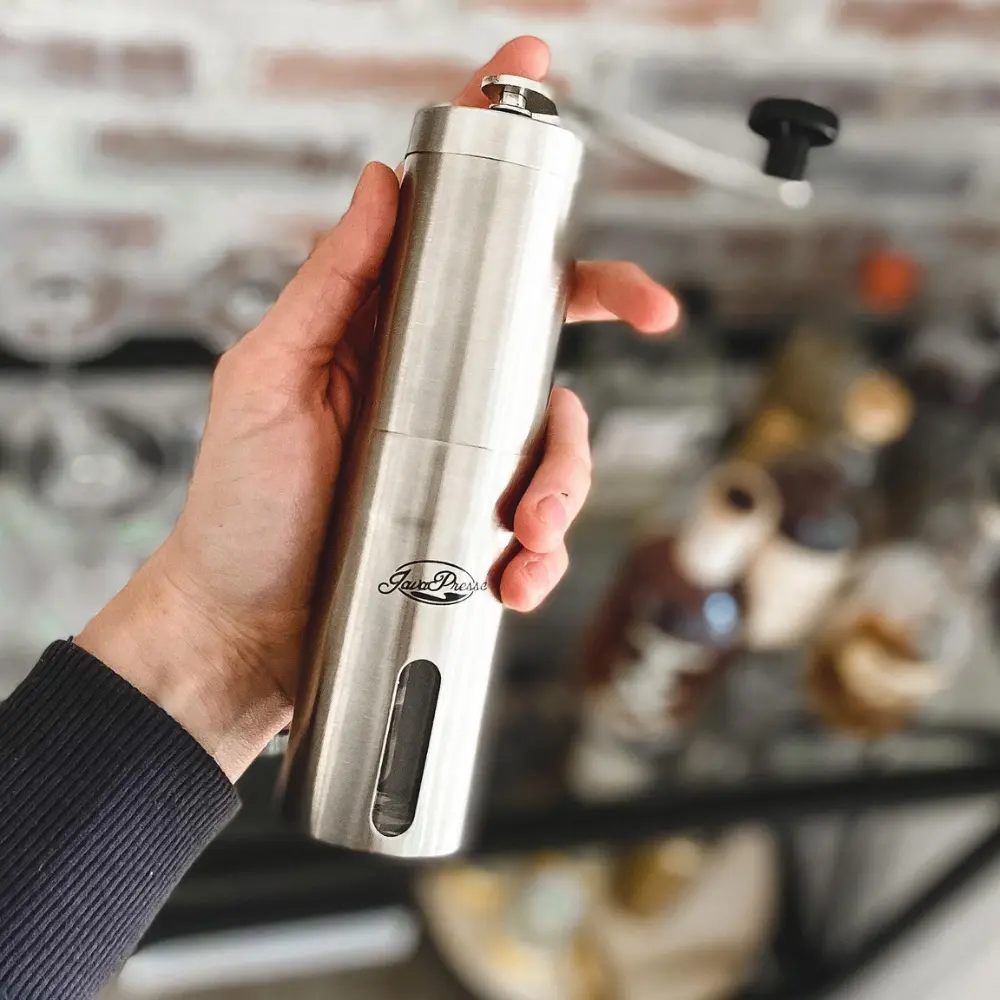
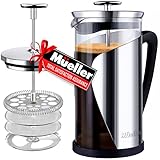
How to Create Cold Foam with a French Press

Your French press coffee maker isn’t just for coffee; it can double up as a milk frother:
- Pour your milk into the French press, but not beyond the halfway point.
- Add any flavors or sweeteners, then replace the lid.
- Pump the plunger up and down vigorously until the milk doubles in volume.
- Pour the foam carefully onto your beverage.
Recommendation: The Bodum Chambord French Press, with its transparent design, serves as an exceptional milk frother by providing a clear visual of the milk during the frothing process.


Creating Cold Foam with a Jar

Another accessible method involves just a jar with a lid:
- Fill a jar no more than halfway with your milk and any flavors or sweeteners.
- Tightly secure the lid and shake the jar vigorously until the milk froths up and doubles in volume.
- Allow the jar to sit for a minute to let the foam set, then scoop it onto your drink.
Each of these methods can help you make delightful cold froth at home. The best part is that you can start right away, with the tools you already have in your kitchen!
Other Tools and Accessories to Enhance Your Foam Experience

While a frother or a blender is essential, a few other tools can enhance your cold foam-making experience:
- Measuring cups and spoons: Precise measurements ensure the perfect balance of flavors.
- Spatula: To get every bit of your precious foam out of the frother or blender.
- Metal Pitcher: A metal pitcher is perfect for making and storing extra froth. Plus, the metal helps keep the foam cold.
- Pouring jug with a spout: This can help you pour the cold froth gently over your beverage, maintaining the foam’s integrity.
By equipping your kitchen with these tools, you’ll be well-prepared to start crafting a delicious and fluffy topping for your beverages.
How to Make Cold Foam: Step-by-Step Guide
Once you’ve assembled your ingredients and equipment, you’re ready to dive into the actual process of creating this foam. We’ll start with a basic recipe and then explore some delicious variations.
Basic Cold Foam Recipe: The Starting Point
Let’s learn how to make cold foam in its simplest form. The basic recipe serves as a springboard to numerous delightful variations:
- Pour 1/2 cup of non-fat or low-fat milk into your frother or blender.
- Froth or blend until the milk has doubled in volume and has a light, frothy consistency.
- Gently pour the cold froth on top of your favorite beverage and enjoy!
Remember, practice makes perfect. You might need a few tries to achieve the perfect consistency.
Vanilla Sweet Cream Cold Foam
Now that you’ve mastered the basic cold froth, it’s time to add a twist. Here’s how to make sweet cream cold foam, a popular variant that adds a layer of sweet, creamy indulgence to your drinks:
- Combine 1/2 cup of non-fat or low-fat milk, 2 tablespoons of heavy cream, and 1 tablespoon of vanilla syrup in a frother or blender.
- Froth or blend until you achieve a rich, creamy foam that holds its shape.
- Gently pour over your favorite beverage for a touch of vanilla sweetness.
This variant resembles the delightful Starbucks cold foam, adding a luxurious layer to your drinks.
Pumpkin Cold Foam
Embrace the flavors of fall with a pumpkin cold foam. This variation adds a hint of warm spices and pumpkin flavor to your frothy topping:
- Mix 1/2 cup of non-fat or low-fat milk, 1 tablespoon of pumpkin puree, 1 tablespoon of maple syrup, and 1/4 teaspoon of pumpkin spice in your frother or blender.
- Froth or blend until the milk has doubled in volume and has a velvety, frothy consistency.
- Gently pour your pumpkin cold foam over your chosen beverage and savor the fall flavors.
Peppermint Chocolate Cream Cold Foam
Ready to dive into a more decadent variation? Meet the peppermint chocolate cream cold foam, a holiday-inspired delight that combines the rich indulgence of chocolate and the refreshing twist of peppermint. Here’s how to create it:
- Start with 1/2 cup of non-fat or low-fat milk in your frother or blender.
- Add 1 tablespoon of chocolate syrup and 1/4 teaspoon of peppermint extract.
- Froth or blend until the milk has doubled in volume and has a velvety, frothy texture.
- Gently pour your peppermint chocolate cream cold foam over your chosen beverage – we recommend hot cocoa or coffee to complement the flavors.
Advanced Techniques for Perfect Foam

While the process of creating this topping is relatively straightforward, there are a few advanced techniques you can employ to perfect your foam:
- Temperature Control: Cold milk holds air better than warm milk, which is why it’s used for this type of foam. But to create the most stable foam, try using milk that’s been refrigerated at 40°F (4°C) or lower.
- Double Frothing: For an even creamier and denser foam, you can try the double frothing method. Froth the milk once, let it rest for a minute, then froth it again. This process allows the foam to stabilize and thickens the texture.
- Slow Pour: When topping your beverage with the foam, pour it slowly to ensure the foam floats on top. Use a spoon to hold back the foam and then gently spoon it over the drink.
- Practice the Swirl: Swirl your milk slightly before frothing. This can help incorporate more air and result in frothier foam.
Common Mistakes to Avoid
Like any culinary endeavor, making this topping has its pitfalls. Here are some common mistakes to avoid:
- Choosing the Wrong Milk: High-fat milk might make a richer foam, but it won’t hold as much air or be as frothy as low-fat or non-fat milk.
- Overfilling Your Frother: Whether you’re using a handheld frother or an electric one, make sure you don’t fill it too much. The milk needs room to expand as it froths. As a rule of thumb, fill it no more than halfway.
- Overfrothing or Underfrothing: Overfrothing can result in stiff, dry foam while underfrothing leads to a runny foam. Aim for the sweet spot where your milk has doubled in volume and has a velvety texture.
- Adding Flavors or Sweeteners Too Late: Add your flavorings or sweeteners before you start frothing. This allows them to incorporate properly and evenly.
With these advanced techniques and precautions, you’re on your way to making the perfect foam every time.
Incorporating Cold Foam into Beverages
Once you’ve mastered making cold froth, the real fun begins as you start incorporating it into various beverages. From classic coffees to refreshing teas and more, the addition of this topping can take your drinks to a new level of deliciousness.
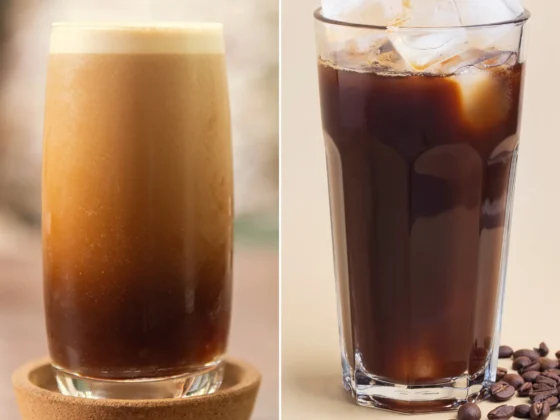
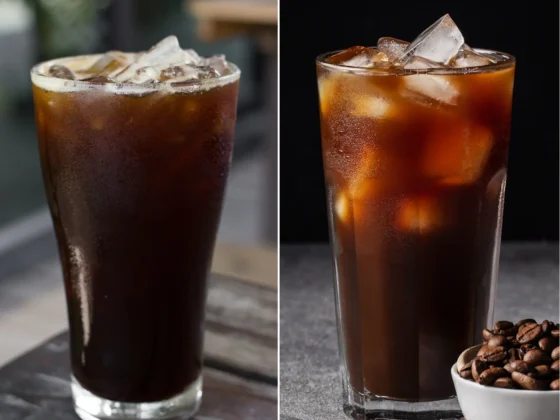
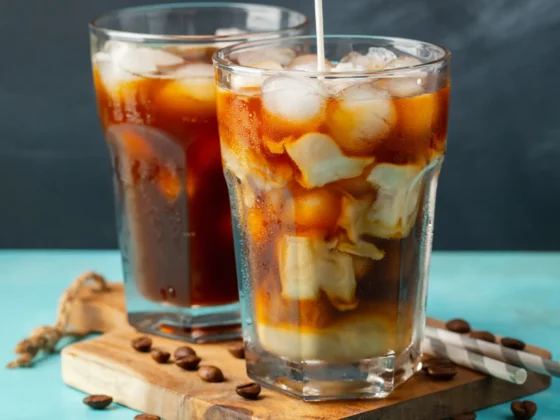
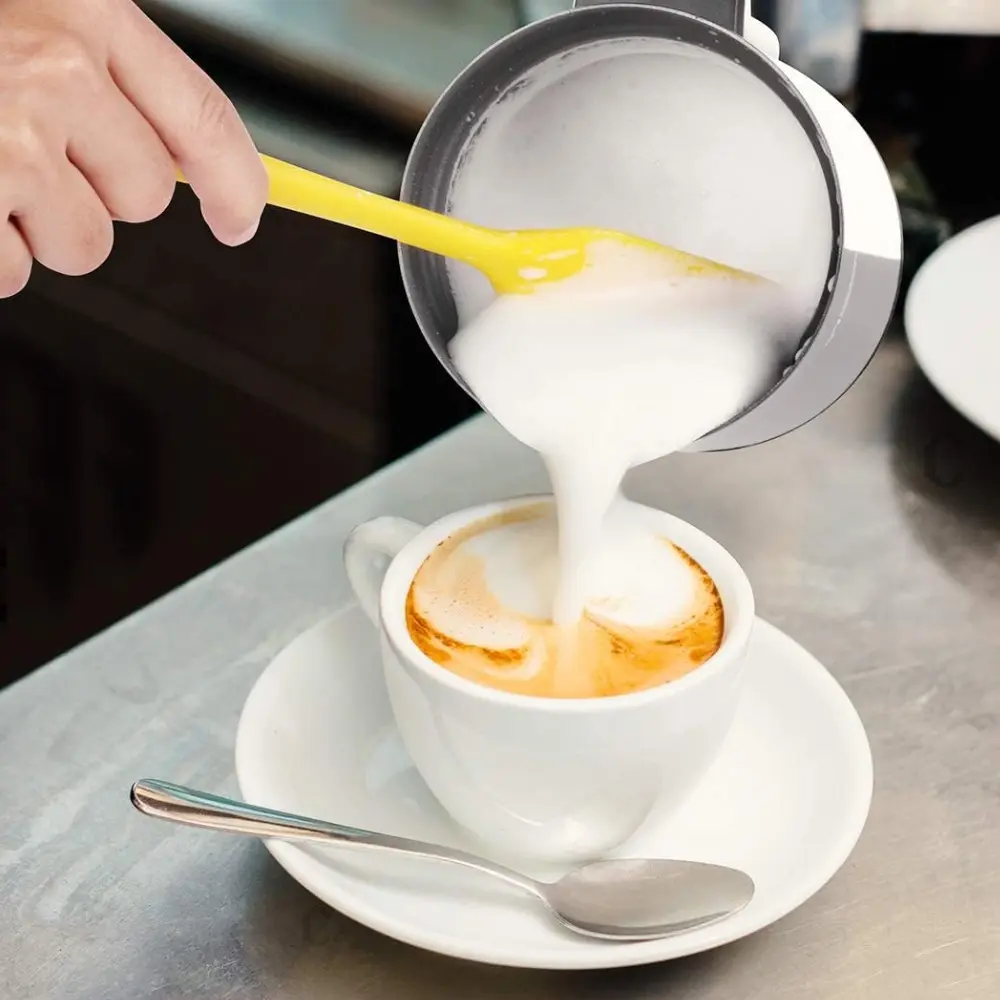
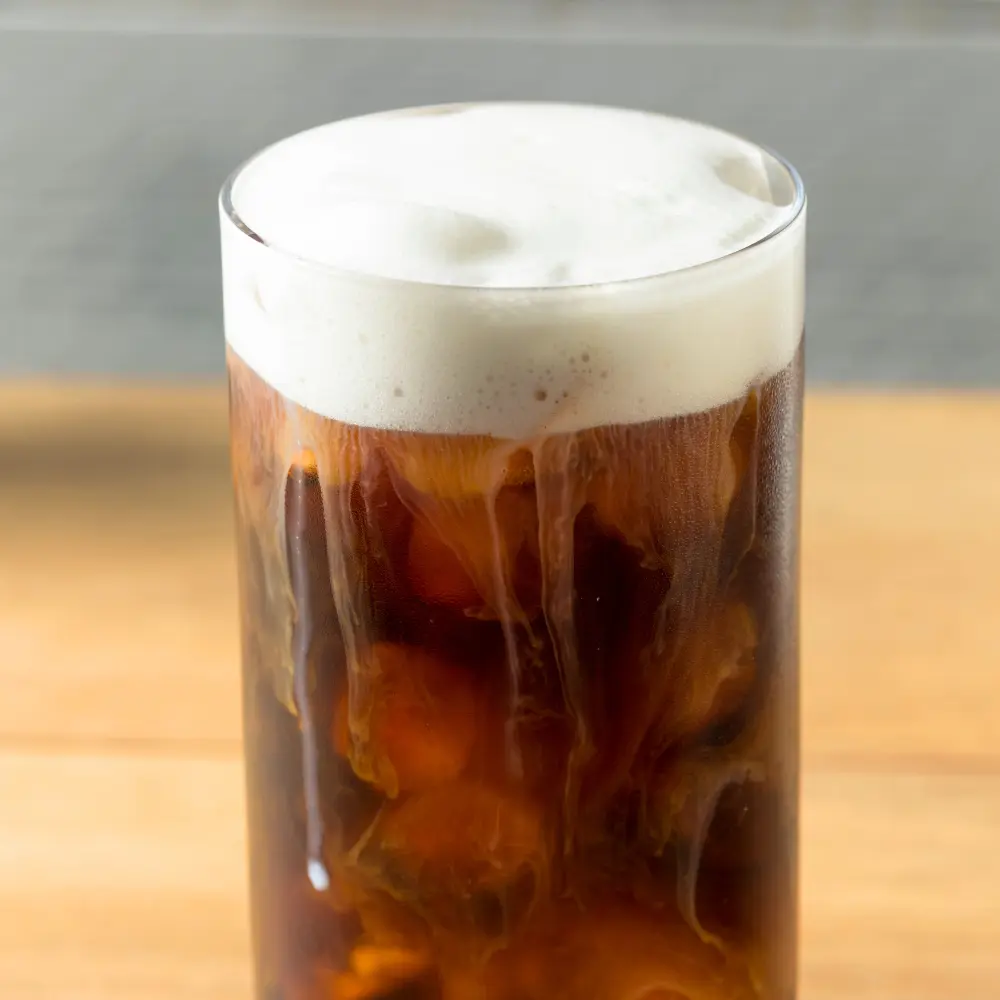
Cold Foam in Iced Coffee: Taking Your Coffee Experience to Another Level
Adding this topping to your coffee can transform your regular cup into a café-style indulgence. It pairs exceptionally well with iced coffee, adding a creamy, frothy topping that enhances the coffee’s flavor profile. To incorporate this foam into your coffee:
- Prepare your iced coffee as usual, including any sweeteners or flavors you prefer.
- Gently pour your foam on top of your coffee, allowing it to rest on the surface.
- Enjoy as the foam gradually mixes with the coffee, creating an enjoyable layered beverage experience.
Remember, This topping isn’t just for iced drinks. Experiment with hot coffee too; the contrast between the warm beverage and cool foam can be delightful.
Cold Foam and Tea: An Unexpected Delight
Cold froth is not just for coffee lovers. Tea enthusiasts can also enjoy this creamy addition. It pairs particularly well with iced teas, where the foam adds a rich, velvety contrast to the refreshing, cool tea. Here’s how to add this topping to your iced tea:
- Prepare your favorite iced tea. Sweeten it if you prefer.
- Gently layer your foam on top of the tea.
- Savor the harmonious blend of the cool, refreshing tea and the creamy foam.
Don’t limit yourself to regular iced tea. Explore flavors like peach tea with vanilla cold foam, or chai tea with cinnamon cold foam for a unique twist.
Beyond Coffee and Tea: Other Drinks with Cold Foam
The versatility of this topping extends beyond coffee and tea. Try adding this type of foam to your smoothies, milkshakes, or even cocktails for a creative touch. It adds a creamy, frothy element that makes any drink feel more special and indulgent.
For instance, try a berry smoothie with vanilla cold foam, or a chocolate milkshake topped with mocha cold froth. Even a cocktail like Irish Cream can be enhanced with a dollop of cold froth on top. The possibilities are endless.
Remember, the goal is to have fun and experiment. There are no fixed rules when it comes to enjoying this topping. So, start frothing and enjoy this creamy delight with your favorite beverages!

Conclusion
In this guide, we’ve taken an in-depth look at how to make cold foam at home, exploring everything from the basics to innovative variations. We’ve shared a basic cold foam recipe and built upon that to create exciting flavor combinations like peppermint chocolate cream cold foam. Armed with your milk of choice, a frother (or even just a jar or a French press), and a willingness to experiment, you’re well on your way to creating creamy delights right in your own kitchen.
Remember, the key to mastering the art of this topping is practice and patience. The consistency, flavor, and even the color of your foam can change based on the type of milk, the frothing technique, and the ingredients you use. So, experiment until you find what you love the most.
And don’t forget to share your creamy creations! Whether it’s over a quiet cup of coffee at home or a festive gathering with loved ones, the joy of creating and enjoying this foam is a pleasure worth sharing.
FAQ
How do you make cold foam without a frother?
You can create this foam without a frother by using a French press, a jar, or a handheld mixer to vigorously agitate the milk.
What is the difference between hot foam and cold foam?
Hot foam is typically used for hot beverages like cappuccinos, while this topping is chilled and used for iced drinks, offering a contrasting, creamy texture.
Can I add flavor to my cold foam?
Yes, you can enhance your foam with a variety of flavors or sweeteners, from vanilla and pumpkin to more decadent options like chocolate peppermint.
How do you incorporate cold foam into different beverages?
Simply pour or spoon your froth onto the top of your chosen beverage, whether it be coffee, tea, or even cocktails, and enjoy the creamy texture it adds.