With such an innovative design, one can’t help but wonder how to use an AeroPress. This device is a relative newcomer in the world of coffee brewing. There are many coffee brewing methods from all over the world to suit an individual’s preferences. Each one promises to yield coffee that tastes great.
What sets it apart is its efficiency, versatility, and portability. There are many ways to enjoy AeroPress coffee. You can choose from a variety of brewing method to suit your lifestyle and preferences, but for those who are always on the go or love to travel, the AeroPress is the best option.
The full kit comes with the attachments and accessories you will need to brew coffee. With a few tweaks to the recipe, you can make anything from brewed coffee, cold brew or espresso.
It is a piston style brewer, which may make it seem intimidating for the uninitiated, but it’s much easier than you think. In this article, we will talk you through the process of using it, its pros, and cons, and compare it with the AeroPress Go and the French Press.
What is AeroPress coffee?
An AeroPress is one of the most popular coffee brewing devices that exists today. An “AeroPress coffee” is, of course, a coffee drink made with the device. It was first introduced in the market in 2005. It is a patented device that extracts coffee from finely ground coffee beans. It is indeed a newcomer in the coffee scene—especially if you compare it with the much-loved, tried and tested French press, espresso machines and pour over coffee.

To use it, you have to follow a step-by-step process that is unique to the device. Although it would seem like the process is complicated, once you try it, you will find that it makes coffee quite fast. You can get a cup of coffee within two to three minutes including prep time.
What you need:
AeroPress kit, which contains the following:
- Chamber
- Plunger
- Funnel
- Scoop
- Stirrer
- Filters
- Kettle with hot water
- Sturdy cup or mug
- Coffee
- Scale
- Grinder
Except for a few essential items, everything that you will need comes in the kit. The scale and grinder are optional. You can always brew pre-ground coffee and measure the right amount using the scoop that comes with the kit.
Brewing with an AeroPress
There are two known methods of extracting coffee using this device: the standard method and the inverted method. The standard method was recommended by AeroPress, while the inverted method was suggested by users and became popular in online communities. Below is a step-by-step guide.

But first, let me give you a heads up: this might seem like a lot of work, but in practice, these steps should take no longer than 2-3 minutes.
The Standard Method:
- Prepare the AeroPress. Boil water to 175 to 205 degrees, then rinse the interior of the chamber with a small amount of hot water. Wet the filter and place it in the cap.
- Prepare coffee: grind to a medium to fine texture. Using the scoop provided, measure out a heaping scoop of ground coffee.
- Place the brew chamber on top of a coffee cup.
- Slowly pour the ground coffee into the chamber. Use the funnel to avoid making a mess. Shake a few times to make sure that the ground coffee is evenly spread out at the bottom.
- Pour in the hot water up to the number 4 notch. Make sure to do this within 10 seconds. Lightly shake or twist the chamber a couple of times to make sure that all the ground coffee is submerged.
- Once the chamber is filled, get the stirrer or a spoon and stir one last time, then plug the chamber using the plunger. Insert the plunger at an angle then straighten it to create a vacuum seal.
- After 1 minute, remove the plunger, stir again then reattach the plunger. This time, start pressing down on the plunger to extract the coffee. This should happen within 60 seconds. Stop pressing down once you hear a hissing sound.
- Cleanup: to clean, unscrew the cap. Push down the plunger to release the cap with the coffee then simply slide the plunger out of the chamber.
- Run all the items through hot water. Leave it to dry then pack away. Otherwise, you can proceed to brewing another cup since the AeroPress is already preheated.
For all AeroPress brewing methods, you must make sure that your mug is sturdy. You will be pressing down on the plunger and directly into the cup, so you need one that can withstand the pressure. Save the delicate and dainty coffee cups for later!
Note: if your plunger goes down too fast, then the coffee is probably too coarse. If the plunger doesn’t seem to go down so easily, then the coffee might be too finely ground
The Inverted Method
For this method, you will use the same materials as the standard method. Keep in mind that the AeroPress will be positioned upside down, so proceed with caution Here’s a detailed explanation of the process:
- Prepare the device. Boil water to 175 to 205 degrees, then rinse the interior of the chamber with a small amount of hot water. Wet the filter and place it in the cap. You may also pre-heat the mug.
- Prepare coffee: grind to a medium to fine texture. Using the scoop provided, measure out a heaping scoop of ground coffee.
- Place the device on the counter in an inverted position. The plunger should be on the surface of the counter, facing up with the chamber attached to it. Do not place the cap on.
- Slowly pour the ground coffee in the chamber (use the funnel to avoid making a mess and wasting precious coffee).
- Optional: pour a small amount of hot water to cover all the ground coffee (up to the 4 notch). Leave it to bloom for about 30 seconds, stirring a few times to make sure that all the coffee is submerged, then pour the rest of the water into the chamber (up to level 1).
- Allow the coffee to steep for 1 minute. Stir slowly.
- Place the cap with the filter on top of the chamber.
- Place a sturdy cup or mug on top of the cap then flip it. Place the cup (with the device still attached) on a flat surface. Alternative: if this is challenging for you, you may simply invert the AeroPress into a cup that on a kitchen counter or table.
- Press down for 20-25 seconds. Stop when you hear the hissing sound.
- Cleanup: to clean, unscrew the cap. Push down the plunger to release the cap with the coffee then simply slide the plunger out of the chamber.
- Run all the items through hot water. Leave it to dry then pack away. Otherwise, you can proceed to brewing another cup since the AeroPress is already preheated.
This method has a higher risk of making a mess if you invert it with the chamber and plunger not securely attached. Be careful and make sure that the vacuum seal is tight before you invert the device. Some say that the inverted method yields coffee with richer flavor. Whether you choose to go with the standard or inverted, you will get a high-quality single cup brew.
Bonus: AeroPress Cold Brew
- Grind the coffee into a fine texture.
- Assemble the device (same as the standard method), place it on top of a cup, then pour the ground coffee inside the chamber.
- Pour room temperature water until level 1. Stir continuously for 1 minute.
- Place the plunger on top of the chamber, then press down gently into the cup.
- Dilute with cold water and/or ice according to your preference.
This method reduces brew time by several hours. Cold brew coffee typically requires a brew time of at least 6 hours, but this method promises cold brew coffee in less than 3 minutes. If you’re a cold brew coffee enthusiast and find yourself feeling a bit skeptical, it wouldn’t hurt to try, right? If you already have an AeroPress at home, then feel free to give this a go!
The Perfect Aeropress Grind Size
According to experienced users, the perfect grind size for the AeroPress is medium to fine (similar to sea salt). Using the right texture is important because it affects the timing of the brew, as well as the flavor of the final product.

Aside from the texture of the coffee, the type of beans you choose will affect the taste, quality, and strength of your drink. Using medium to fine ground coffee is a good starting point, following the steps listed above. As you become more accustomed to using the AeroPress, you can play with coffee-water ratios to find the flavor that suits your palate. Learn more about grind sizes with our Coffee Grind Size Guide.
The Perks of Using an AeroPress
One of the main selling points of the AeroPress is that it is versatile, cost efficient and timesaving. You can have a cup of coffee within 2 to 3 minutes, including preparation and cleanup.
You have the option to use a separate grinder to make sure that you’re brewing freshly ground beans, and a weighing scale to ensure accurate measurements. However, having the scoop is good enough, especially if you’re traveling., The scoop measures the amount of ground coffee that you are supposed to use for one serving. All you need to do is put a heaping scoop of ground coffee (approximately 17 g) into the cap and brew away!
A Travelling Buddy!
Because it is portable, durable, and easy to clean, a growing number of camping and travel enthusiasts have sung praises for the AeroPress. On top of that, it only takes about 2-3 minutes to brew! This device does not require electricity. You have the option of boiling water from a stovetop or from an electric kettle.

While it is great for travel and outdoor activities, it is also great for home use. The full kit contains everything that a person needs to create the perfect brew. It makes for a great gift for your fellow coffee lovers.
Cleanup up is fast and easy. Pop out the cap containing the used ground coffee and filter. Dump the used coffee in your compost bin, and rinse. Rinse the interior with hot water to prepare another cup or rinse with ordinary water. Leave to dry then place it back in storage.
Using the AeroPress might have a learning curve for some, but the kit comes with detailed, easy-to-follow steps on how to use it. There are also a lot of videos and resources online.
A warning: since the coffee extraction will require you to push down on the plunger to get the coffee extract, it can be challenging for those who have arm and shoulder injuries.
AeroPress vs AeroPress Go
AeroPress Go was introduced to the market not too long after the original AeroPress. Compared to its predecessor, it is more portable and sleeker. It has a more compact chamber and plunger, foldable stirrer, a flat filter cap, and a cup.
They removed the funnel, made the essential parts more compact. It comes with a portable mug that perfectly fits the chamber. It essentially has the same function as the original, but the serving is smaller (8oz instead of 10oz).

Which should you get? It really depends on your preferences. The original device works fine and has a lot of good reviews, but for an additional couple of dollars, you can get the AeroPress Go. Those couple of dollars will get you a device that is sleeker in design. It lets go of unnecessary parts like the funnel, changed the filter cap into a disc shape, and includes a cup. The only downside to it is the smaller brew capacity. The original can produce up to 10oz of coffee, while the Go can produce only 8oz of coffee. A quick fix for this would be to make a strong coffee concentrate and simply dilute it to make more servings. You can use the cold brew method we shared above!

If you already have an AeroPress, you don’t need to buy a new one, but if you’re looking to buy your first coffee device from this brand, then it might be best to get the AeroPress Go.
AeroPress vs French Press
The AeroPress and French press are often compared because both require application of pressure (pressing down) to extract brewed coffee and do not require the use of electricity. However, that’s where the similarities end. Below are some descriptions and comparisons between the two brewing methods.
AeroPress Coffee Maker
The AeroPress is made of durable BPA free plastic and produces about 8 to 10oz serving of coffee or coffee concentrate. Brew time takes about 1 to 3 minutes.

Due to its versatility, you can come up with different recipes, playing with the water-ground coffee ratios, texture of ground coffee and temperature of water. Because it uses filters, the product is free from sediments and oil. As a result, the coffee tastes clean but has depth of flavor.
No products found.
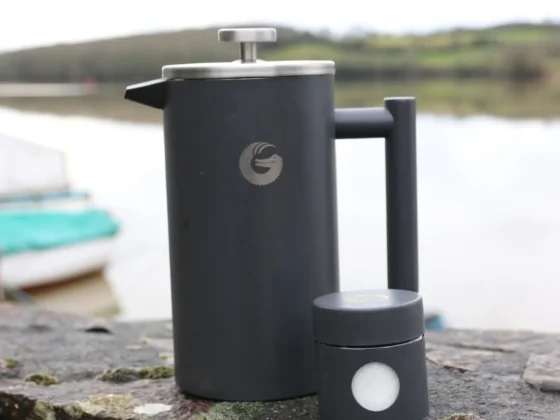
The French Press
The French press is usually made of glass, metal or ceramic, and can make up to 35oz of coffee in one brewing period. This depends on the capacity of the French press, as well as the amount of coffee and water you use.

It is preferred by many because it of its simple and straightforward structure. All you have to do is to put coarsely ground coffee and hot water in the French press, leave it for about 3-5 minutes, press down on the metal mesh, and pour into a cup.
Whereas AeroPress recommends using medium to fine ground coffee, the French press requires coarsely ground coffee to prevent it from going through the mesh filter. It is one of the lowest maintenance brewing methods because you’re literally just putting ground coffee and hot water in a vessel and leaving it along for about 3-5 minutes. It’s also good for making large batches of coffee.
No Paper Filters
Because it does not use a paper filter, oil and sediments can still pass through the mesh filter, which results in strong (some say muddled) tasting coffee. It is an acquired taste but is has remained to be popular for decades for good reason. A simple fix would be to run the coffee through a paper filter before serving.
Both brewing devices are easy to use. It’s just a matter of deciding what type of product you like. A strong, clean tasting brew from the AeroPress or a strong, robust blend using the French press? Either way, you’re getting a high-quality product especially if you choose your beans well.
No products found.
Final thoughts
Learning how to use an AeroPress is a breeze! It is worth the effort because you’re signing up for well-made coffee that is made fast and tastes great. Of the many brewing methods that are available, this seems to be one of the most practical because the apparatus is compact, the kit comes with everything that you will need except for the hot water and a cup (if you’re not using the AeroPress Go). This device is also energy efficient. It does not require electricity and it somehow produces coffee that is clean and has depth of flavor. No matter which model you choose, you can consider the AeroPress as a good investment for home or travel.
IF YOU’VE ENJOYED THIS ARTICLE, GIVE IT A PIN!


1 comment